Read Time: 2 min 57 sec
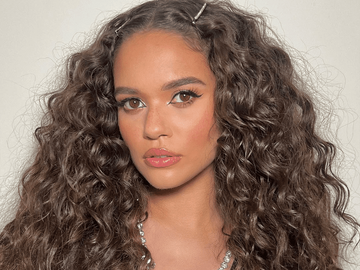
There are important - party-friendly - holidays left in 2019. Between Thanksgiving, Friendsgiving, corporate parties, and other holiday celebrations, there are plenty of occasions to get dolled up for. Not to mention, the next 20’s decade is days away and we’re ready to revive all the Gatsby-Esque trends.
Normally at TYME, we focus on getting you out the door as fast as possible, but for this TYME style we’re taking the time to show you how destroying a look can lead to complete glamor. The best part? This style will still only take a fraction of the time.
To create glam waves you’ll need the following tools:
- TYME Iron
- BigTYME Root Lift Powder
- Paddle Brush
- SelfieTYME Hairspray
- Hair clips (optional)
Step 1: A Perfect Curl

Start building glam waves by curling your entire head of hair. We suggest parting your hair in 3-5 sections to ensure every strand is curled. Glam waves require extremely consistent curls. Normally for TYME style parting and consistency aren’t necessary, but this style is a bit more complex.
Before you start the process decided where you’re going to wear your part. We suggest either a middle or deep part, depending on whether you’re going for a fun or sophisticated look. This will matter when curling your top section.
The best way to create the same curl again-and-again is to curl a small section with your TYME iron held horizontally. While pulling upward, rotate your iron towards the floor immediately. This will give you tons of volume and a solid curl from the root. Pull your iron all the way through the end of your section. Make sure your curl has a chance to cool and set, especially focus on the amount of curl by your roots.
When you get to your top layer, don’t stray from forward-facing curls. A glam wave look THRIVES with forward-facing curls. Curling your whole head one direction is a great way to create this look, with the forward facing curls being on the side of your head that has more hair.
Step 2: Make It BIG!

Depending on your hair texture, add a little - or a lot - of BigTYME throughout your hair. The lifting powder will help secure all the volume you’ve just added to your hair and act as a texture additive!
Step 3: Destroy It All

But gently! Grab your paddle brush and softly brush your curls out starting from the bottom and working your way up. Once your full head is brushed out, use your paddle brush to back brush your locks. This will encourage them to go back to their cooled curl stage. This will feel similar to teasing your hair, but you’ll want to apply much less pressure.
Depending on your hair type one of two things can happen (1) the curls will fall back into place and you can skip step three or (2) it will look as if your curls have completely fallen. DO NOT WORRY. Step three will get you back on track.
Step 4: Salvage
Your hair has already cooled with a significant curl in it. Your hair should want to bounce back to that cooled state. Gather your hair and part it into six or more sections. We suggest separating as if you’re going to make pigtails and creating three sections out of both halves.
Take each section and wrap it around your finger to morph it into one giant curl. Once you have your six giant curls, use your fingers as a comb to softly open the giant curls. This should result in uniform back and forth style curls.
Step 5: Build It Up + Secure

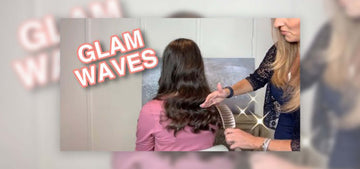
Option 1: Using your paddle brush and hair clips gently lift and encourage one valley of hair to move in one direction and the valley below in the opposite direction. Repeat throughout the length of your hair. ** If you hair frequently kinks we suggest trying option two (below) first.
Option 2: Use your paddle brush and the curve of your hairspray can to lift and encourage one valley of hair to move in one direction and the valley below in the opposite direction.
Repeat throughout the length of your hair. Once your glamorous valleys are up to par, secure them with SeflieTYME hairspray!
You’re now ready to take on any type of party!
For more tips and hair tutorials, follow us on Facebook, Instagram, YouTube, and Pinterest.
