Why won’t the back of my hair curl? 4 common reasons why and how to fix them
You know the feeling. You've just finished curling your locks and are feeling like you’re in a hair commercial. But then, the dreaded mirror check. The front? Bouncy, voluminous curls. The back? Well, let's just say it's not quite living up to the same standard.
It's a frustrating reality that's all too familiar: the front of your hair looks ready for a night out, while the back is stuck in a perpetual ‘bedhead’ state—leaving you feeling deflated and wondering, “Why won’t the back of my hair curl?” It's enough to make you question your styling skills and reach for a ponytail (again).
But don't worry, you're not alone in this struggle. Taming those back sections can be tricky, but it's definitely not impossible. We’ll explore the reasons why the back of your hair might be resisting your curling efforts, and arm you with the tips and tricks to achieve those flawless, all-over curls you've been dreaming of.
Why is the back so tricky?
So, what's the deal with the back of your head being such a hairstyling black hole? Why do those curls seem to vanish into thin air, leaving you with a frustratingly flat finish? Well, there are a few key factors at play:
Limited visibility
Let's face it, you're not an owl. You can't swivel your head 360 degrees to get a perfect view of what's happening back there. This lack of direct sight makes it challenging to control the curling iron's angle, the tension on your hair, and the overall curling process. It's like trying to draw a masterpiece with your eyes closed—the results are bound to be a bit... abstract.
Awkward angles
Curling the back of your head requires some serious contortionist skills. You're twisting your arms, craning your neck, and hoping for the best. These awkward angles can make it difficult to hold the curling iron steady, resulting in uneven curls or, worse yet, accidental burns. Ouch!
Hair type and length
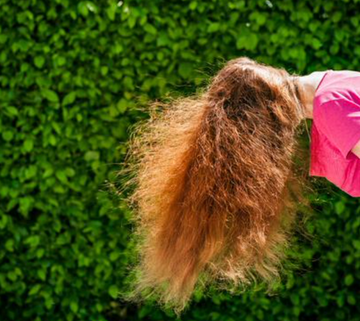
Your hair's natural texture and length can also play a role in the back-of-the-head curling struggle. Fine or straight hair tends to be more resistant to holding curls, especially in those hard-to-reach areas. And if you have long hair, the weight can pull down the curls, making them appear less defined or even completely flat.
4 reasons why your back curls aren’t cooperating
Now that we've identified the key challenges of curling the back of your head, let's get down to the nitty-gritty. There are a few common culprits that can sabotage your curling efforts, but fear not, we've got the fixes to turn those hair struggles into hair triumphs.
Reason #1: Your technique is all wrong
Even the most seasoned hairstylists can fall prey to technique mishaps. When it comes to the back of your head, these mistakes can be particularly detrimental:
→ Holding the curling iron wrong
It may seem simple, but the way you hold the iron can make a big difference. Gripping it too tightly can create creases in your curls while holding it too loosely can result in uneven heat distribution. Aim for a firm but gentle grip, and make sure the barrel is parallel to the floor for consistent curls.
→ Wrapping hair unevenly or too loosely
We get it, it's tempting to rush through those back sections, but haphazard wrapping will only lead to disappointment. Take your time to ensure each section of hair is wrapped evenly and snugly around the barrel. Loose wrapping can result in limp curls that fall flat faster than a soufflé in a drafty kitchen.
→ Not allowing enough heat exposure
Patience is a virtue, especially when it comes to curling. Don't be afraid to hold each section on the iron for a few extra seconds to ensure the heat penetrates the hair shaft and sets the curl. Rushing through the process will leave you with half-baked curls that won't last.
Reason #2: You’re not using the right tools
Just like you wouldn't use a teaspoon to eat soup, you shouldn't use the wrong curling iron for your hair type and desired style. Here are some factors to consider:
→ Barrel size
If you have long hair, a smaller barrel might not be able to wrap all your hair, resulting in uneven curls or even straight ends. Similarly, a large barrel might not create enough definition for shorter hair. Choose a barrel size that's appropriate for your hair length and the type of curls you want to achieve.
→ Quality
Investing in a high-quality curling iron with adjustable temperature settings is key. Cheap or damaged tools can distribute heat unevenly, leading to frizz, damage, and inconsistent curls.
Reason #3: Your product choice (and application) is holding you back
Hair products can be your best friend or your worst enemy when it comes to curling. Here are some things that could be holding you back:
→ Product overload
We all love a good hairspray, but too much product can weigh down your curls and prevent them from holding their shape. Start with a small amount and gradually add more if needed.
→ Wrong product choice
Not all hair products are created equal. Some are designed for hold, others for volume, and some for both. Choose products that complement your hair type and desired style. If you have fine hair, opt for lightweight mousses or sprays. For thicker hair, a stronger hold gel or cream might be necessary.
Reason #4: Your hair isn’t in its best condition for curling
The health and condition of your hair play a major role in its ability to hold a curl, and this is especially true for the back sections, which are often more prone to dryness and tangles.
→ Damaged or dry hair
If your hair is damaged or dry, it's going to struggle to hold a curl, no matter how skilled you are with the curling iron. Focus on repairing your hair with deep conditioning treatments and hydrating products before attempting to curl it.
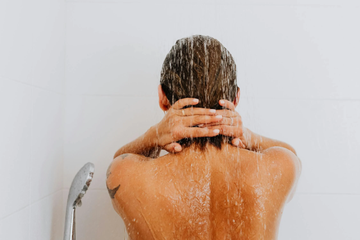
→ Freshly washed hair
While it might seem counterintuitive, freshly washed hair can be too slippery to hold a curl. Try curling your hair on the second or third day after washing, or use a texturizing spray to add some grip.
Wrapping up: Once you’ve identified which one of these reasons is depriving you of that salon-worthy look, you’ll be well on your way to nailing those elusive, bouncy curls at the back of your head. But don't stop there. Keep reading for more tips and tricks to help you master back-of-the-head curling.
How to curl the back of your hair by yourself
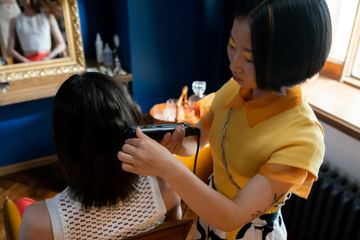
Okay, let's get down to business. You've identified the challenges, but the burning question remains: how do you actually curl the back of your hair? We've broken down the curling process into manageable steps, so you can conquer those back sections with confidence.
Step 1: Secure your styling tool
Select a curling iron or wand with a barrel size that suits your hair length and desired curl type. For tighter curls, opt for a smaller barrel. For looser waves, go for a larger one. If you're struggling with maneuverability, consider the TYME Iron Pro. Its unique shape and design make it easier to reach those back sections and create a variety of curls with minimal effort.
Step 2: Prep and protect
Apply a heat protectant spray generously to dry hair. This will create a barrier against heat damage and help your curls last longer.
Step 3: Divide and conquer
Section your hair into manageable portions, starting from the bottom and working your way up. This will make the curling process easier and ensure even heat distribution.
Step 4: Set up a second mirror
Position yourself in front of a mirror with a second mirror behind you, or use a handheld mirror to get a clear view of the back of your head.
Step 5: Get your angle right
Slightly tilt your head forward or to the side to improve access to those back sections. For particularly tricky areas, bring sections of hair forward over your shoulder and curl them as you would the front.
Step 6: Curl away (or towards)
Experiment with curling away from your face or towards your face to see which look you prefer. Alternating directions can create a more natural, textured effect.
Step 7: Set and cool
After curling each section, gently clip the curl in place to help it set and cool down. This will make sure your curls last longer and don't fall flat.
Step 8: Release and style
Once all sections are curled and cooled, carefully remove the clips and gently style your curls with your fingers or a wide-tooth comb.
Step 9: Lock in with hairspray
Mist with a light-hold hairspray to help your curls stay put all day (or night!) long.
Step 10: Practice until perfect
Remember, don't get discouraged if your first few attempts aren't flawless. With a little patience and persistence, you'll be a back-of-the-head curling pro in no time.
You've got this!
See? Curling the back of your hair isn't rocket science, it just takes the right knowledge and a little practice. With the tips and tricks we've shared, you're well on your way to achieving those salon-worthy waves all over. So go ahead, rock that flawless look, and remember: the back of your head is no longer a no-curl zone!