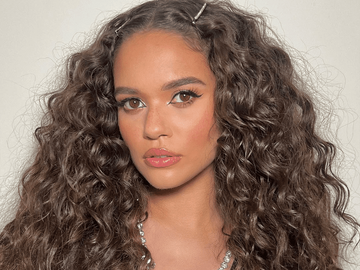
- If you have a kink or crimped look at the top, make sure you are sectioning your hair forward. That will set all of your hair up to travel forward and smooth the section. You can see how in our "Learning the Angles" video below.
- If it is little flyaway hairs that you are referring to, those happen because you are curling all of the hair away from your head. As a result, the shorter hairs pop out. This is easily solved by using a fine-tooth comb to smooth the top or by spraying hairspray and using the side of the can to smooth the top:)
We are dedicated to making sure you love your TYME products! We offer FREE HangTYME (fun and interactive group learning sessions with inventor & CEO, Jacynda Smith) and StyleTYME (one-on-one sessions with a stylist available upon request) appointments with every purchase! Sign up here.
Here is a video that will help with your technique!
Hey everyone. Today I'm teaching you in the mirror, so you can set your device up in the mirror as well. We're going to learn this drawing. It came from Melissa. She was one of my FaceTime sessions. These are the notes she took, and I think they're genius. I can't wait to teach them to you.
We're going to start out by picking up the iron with your right hand. Right hand with your thumb behind the blue light and the guidelines, (or guide side on the TYME Iron Pro), are on the opposite side of your hand. We're going to bring the guidelines up at a 45-degree angle on your right side, and we're going to show that line in the mirror. So, you have your 45-degree angle. Then we're going to put your cord down. On the left side, we're going to do the guidelines to your head at the 45-degree angle. Take that line and draw it on the left side. This time, your cord will be up. So, we have a 45-degree angle on both sides, which looks like a Rooftop.
We're going to take the hair, again at a 45-degree angle, guidelines to your head. Rotate the guidelines towards the line and move forward. Now we're moving down to a point of reference on the right. So this is where we move to. We're going to reflect the same thing on the left. Here's our point of reference. You come in. Guidelines matching your 45-degree angle, rotating them forward, and bringing them down to your point of reference. On the left side, bring my guidelines to my head. Match my 45-degree angle.
Rotate the guidelines, and then move in the direction of the lower left reference point, making sure to always fold my iron at that same angle moving down. This time I'm pulling the piece of hair forward to make sure that I'm going in line with the direction I'm going to travel. This will help alleviate creases and different marks. Everything sets up for success when you start with your hair going forward. We're going to put the guidelines in towards the scalp. Rotate towards our point of reference, and move down to the point of reference as well. Again, right thumb behind power button, hair facing forward, guidelines to the scalp. Rotate guidelines forward.
Move forward. Notice how I dropped the hair down over the back, and I'm picking it up underneath and leading forward with it. I do that and make sure that the tip of the iron is going to hit just a little bit before the cord of the iron. This motion of holding the hair and leading with the tip of the iron on the right side will make sure that your hair doesn't fall out as you're going long. We're going to put the hair forward, thumb behind blue light, guidelines in. Guidelines rotate forward. Pick up the hair underneath. Lead with the hair and go to your point of reference. You will get a curl every single time doing those motions.
On the left side, right thumb behind power button, hair coming forward, guidelines to use ahead, cord up. Rotate guidelines forward at the 45 degree angle and work to your point of reference. On the left side, everything stays the same as the right, except this time we come up over the top, leaving our cord at the top. Rotate guidelines. Move forward going towards the mirror. Again, the tip of the iron leads the way. Guidelines to the head. Rotate forward. Go forward. Make sure that you're using the right amount of tension so it's not tugging, and letting it glide through, and the right speed so that when your hair comes out it looks like silk. If you go too fast, it'll look like frizz.
I place it in, making sure the hair is on the plate, nice and spread out. As I do this motion, holding the hair, straightening it out, it's keeping it spread out as it feeds into the iron. That will give you a more spread out full curl. It's a great tip for people with fine hair. In the back right, everything stays the same. Guidelines in. Rotate them towards the mirror and work to my same point of reference, making sure I stay close to my head where I can almost bonk it with the iron. It's important to stay close to your head and not work out to the side.
If my hair is shorter, I'm just going to grab the piece closer and show you what a shorter piece would look like. If it's really short, I go in with my guidelines there, do everything the same. Here short hair would fall out. Long hair, you just continue forward. On the upper left section forward, as always pulling your hair forward. Every single piece of hair is sectioned coming forward because that's the motion we're taking the care. Lift your cord. Guidelines to the head. Rotate guidelines to the mirror and move to your lower point of reference, making sure the hair doesn't fall off the plates. Section the hair forward. If it was shorter, I'm going to hold really close to show you what a shorter piece would look like. We're going to come in, angle the iron, rotate, move forward as I wrap it around my head. There, a short piece ends. For longer hair, you just keep moving forward. Always working forward towards the mirror as your point of reference. Staying closer to your head makes curls form better.
For lower pieces, just come in. Move your chin out of the way and go forward to your point of reference. Frizz and creases are two easy problems to address. Creases, prep the hair by going forward. Make sure you don't squeeze tight, and roll it back. Then you can slowly increase your tension if needed. Most of the time, you don't need to. Frizz is caused by going too fast. If you go the right speed, your hair will come out looking like silk. Make sure you do that. When it looks like silk, that's when the curls last longer. We're going to pick right back up, the angle being the 45-degree angle. Rooftop line. Going forward. This is how you approach your hair from every angle of your head, from the front, from the back, from the side, from the front. Always using that same motion. Once you've learned these principles, you'll be able to change them and apply them in different ways, but you need to know the rules to break the rules.
For more tips and hair tutorials, follow us on Facebook, Instagram, YouTube, and Pinterest


