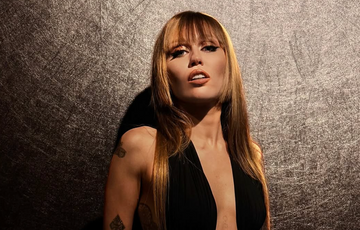
Forgot your curling iron? We’ve got you covered.
You’ve just arrived at your long-awaited girls' trip, excitement buzzing in the air, and you’re ready to paint the town red. But then—uh-oh! Someone forgot to pack the curling iron. Cue the collective gasp! That perfectly tousled, bouncy look you envisioned for tonight's festivities? Yeah, it’s feeling pretty out of reach. The thought of rocking flat hair when you could be turning heads? Not on our watch!
But before you spiral into a mini hair crisis, let’s talk about your trusty flat iron. Whether you call it a straightener or a flat iron, this multitasking tool is about to become your new best friend. It’s sleek, stylish, and ready to save the day. With just a few clever techniques, you can transform your hair from blah to beautiful and achieve those soft, luscious curls that will have everyone wondering where you found the time to get so damn glam.
Curling with a straightener might sound like a stretch, but trust us—it's easier than it sounds, and the results can be seriously good. Imagine stepping out with waves that flow like you have your own stylist team on tap, all while knowing you didn’t even need to pack an extra tool. It’s all about using what you've got and making it work for you, so let's take a dive into the art of curling hair with a straightener. Your hair deserves to look STUNning no matter what tools you’ve got.
Why use a flat iron to curl your hair?
Why bother curling with a flat iron when there are curling wands, hot rollers, and all those fancy gadgets out there? Well, for starters, your flat iron is probably the most versatile tool in your beauty arsenal. It's like the Swiss Army knife of hairstyling! Not only does it straighten, but it also creates beautiful curls, waves, and everything in between.
Using a flat iron to curl your hair has some serious perks. First, it saves space in your travel bag—no need to lug around multiple tools when one can do it all. Plus, you have more control over the size and shape of your curls. Want loose, beachy waves for that cute café brunch? Or tight curls for a night out dancing? With a flat iron, the choice is yours.
Another fab benefit is the time saved. You can go from straight to curls in a fraction of the time it would take to heat up a curling wand. And let's be real: when you're on a girls' trip, time is of the essence! Between snapping selfies, enjoying cocktails, and planning your night out, who has the luxury of spending ages on hair?
Also, flat irons often create a shinier finish than traditional curling tools. The way they glide over your hair can help seal the cuticle, leaving your locks looking polished and healthy. So not only will you look great, but your hair will feel fabulous too. It’s a win-win situation for all.
Ready to ditch the curling iron myths? Let’s break down how to curl your hair with a flat iron, so you can step out looking FIRE—no fancy tools required! Grab your straightener, and let’s get curling.
The right technique
Alright, now that you’re pumped to master the art of curling with a flat iron, let’s get into the nitty-gritty of the technique. Don’t worry, darling, we’re breaking it down step by step to make it as easy as pie. Grab your straightener, and let’s turn those straight locks into some curly wurlys.
Step 1: Prep your hair
Before you begin, make sure your hair is clean, dry, and tangle-free. If you’re starting with second or third-day hair, a light spritz of dry shampoo can help absorb any oil and give you some grip. This is key for curls that actually hold! A heat protectant spray is a must too—protect those luscious locks from damage.
Step 2: Section it off
To make your life easier, section your hair into manageable parts. Divide it into 2-4 sections, depending on how thick your hair is. You can use hair clips or ties to keep everything organized. Think of it like organizing your closet—just makes everything easier in the long run.
Step 3: Get the right heat setting
Now, set your flat iron to the right temperature. For fine or damaged hair, aim for around 300°F (150°C); medium hair can handle around 350°F (175°C), while thicker hair might need 400°F (200°C). If you’re unsure, always start lower and work your way up—no one wants crispy curls!
Step 4: Start curling
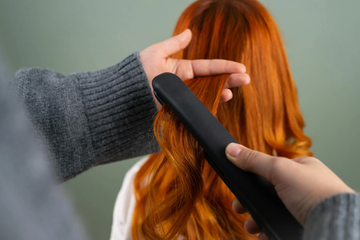
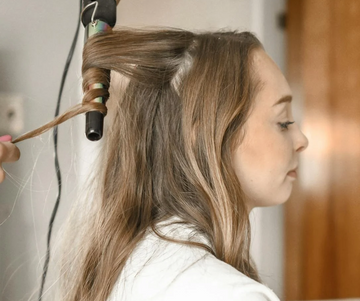
Take a small section of hair (about 1-2 inches wide), and clamp the flat iron around the mid-lengths of the hair. Here’s where the magic happens. Twist the flat iron away from your face while simultaneously pulling it down towards the ends of your hair. This technique creates a beautiful curl without that crimped ‘90s look (no judgment over here, we still love the ‘90s).
Step 5: Release and repeat
Once you’ve twisted all the way down to the ends, gently release the hair from the iron. Voila! You’ve just created a fab curl. Don’t forget to hold the curl in your hand for a few seconds to let it set before letting it go fully. Repeat this process on all sections, switching up the direction of the curls every few sections for that effortless, “I woke up like this” feelin’.
Step 6: Finish up
After curling, run your fingers through your hair to separate the curls for a more lived-in look. If you want extra hold, a light mist of hairspray can help keep your style in place without feeling crunchy. For a touch of glam, you can finish with a serum to add shine. Just like that, you’re ready to rock those gorgeous curls! Whether you’re heading out for a fun night with your girls or enjoying a day of sightseeing, your hair is now on point and totally selfie-worthy.
Tips for curling hair with a flat iron
So, you’ve got the basics down, but let’s level up your curling game with some pro tips that’ll have your hair looking runway-ready in no time. Curling with a flat iron is all about finesse, and these tricks will make sure you nail that chic, tousled look without breaking a sweat!
1. Experiment with different curl sizes
Don’t feel boxed in by one curl size! Depending on your mood and the vibe you’re going for, switch it up like you would your favorite playlist. For tighter, bouncier curls, use smaller sections of hair and twist them more tightly. If you’re feeling that beachy, laid-back look, go for larger sections with a looser twist. Mixing it up not only keeps things interesting but also gives your hairstyle that dynamic, natural feel. Because who wants to look like they just walked out of a hair commercial, right?
2. Use the right flat iron
Not all flat irons are created equal, darling! Look for one with rounded edges to help you achieve those perfect curls without any kinks (cough cough, the Tyme Iron Pro). Ceramic plates are fabby for even heat distribution, while titanium plates heat up faster and work wonders on thicker hair. Do a little research to find the one that suits your hair type best. Trust us, it’s worth it! You’ll feel like you’re wielding a magic wand instead of a hair tool.
3. Curl away from your face
Here’s a game changer—always curl the hair away from your face. It opens up your features and gives you that soft, romantic look. It’s a subtle trick that makes a big difference, leaving you looking effortlessly done. You’ll feel like you just strolled off a movie set, and let’s be real, who doesn’t want that?
4. Don’t rush the process
Curling with a flat iron takes practice, so don’t rush it! Take your time to master your technique and find what works best for your hair. If you’re not getting the results you want right away, don’t get discouraged—every attempt is a step closer to becoming a curling queen! Remember, good things come to those who wait… and perfect curls don’t happen in a hurry.
5. Create texture
For an extra boost of volume and texture, try spritzing some sea salt spray or a texturizing spray on before curling. This little hack helps your curls hold their shape while giving you that “just off the beach” vibe. Plus, it adds some grit, ensuring those curls won’t fall flat by the time the party starts. After all, you didn’t pack all this heat for nothing!
6. Style for the occasion
Think about what you’re dressing for and tailor your curls accordingly. If it’s a casual day out, loose waves will keep things breezy and effortless. For a fancy dinner or a night out with the girls, tighter curls or elegant updos can elevate your look to the next level. Matching your hairstyle to your outfit ties everything together and makes you feel like the confident, boss-babe that you are.
How to maintain your curls all day long
You’ve nailed the curling technique and are rocking those gorgeous waves—now let’s make sure they last! Nothing is worse than spending precious time on your hair only to have it fall flat before you even make it to the party. Here are some go-to strategies to keep your curls looking good from day to night.
1. Set those curls
Just like you wouldn’t leave the house without a killer outfit, don’t skip this step! Once you’ve curled your hair, give it a light spritz of hairspray to set those curls in place. Look for a flexible hold spray that won’t leave your locks feeling crunchy. You want to maintain that soft, touchable texture while ensuring your curls stay bouncy and intact. A quick spray after curling will work wonders—trust us, it’s the final touch that ties everything together.
2. Don’t over-touch your hair
We get it—your hair looks incredible, and you want to show it off! But resist the urge to constantly run your fingers through your curls. While it’s tempting to fluff and adjust throughout the day, too much touching can loosen your curls and create unwanted frizz. Instead, admire your look in the mirror (we know you will!), give it a quick fluff at the roots if needed, and leave it be.
3. Avoid humidity
Ah, humidity—the ultimate curl killer. If you’re heading to a particularly muggy locale, consider prepping your hair with an anti-frizz serum or cream before curling. These products act like a shield against the elements, helping to lock in your curls and keep them looking fresh, no matter what Mother Nature throws your way. If the forecast isn’t in your favor, a cute hat or chic scarf can also be a stylish lifesaver!
4. Refresh your curls
When it’s time to hit the snooze button on your next hair wash day, don’t fret! You can refresh your curls with a simple routine. Spray a bit of water or a curl-refreshing spray to revive those waves and re-curl any sections that need a little love. Alternatively, you can use a flat iron to touch up those spots that fell flat during the night. A quick 10-minute fix can have you looking fabulous and ready to conquer the day in no time.
5. Plan for the next day
If you know you’ll need those curls to last until the next morning, try sleeping with your hair styled. You can loosely twist your hair into a bun or braid it before bed, which helps maintain your curls while you sleep. Just be sure to use a silk or satin pillowcase to reduce friction and prevent breakage. The next morning, simply shake out your hair and voilà! Instant volume and waves that look freshly curled.
Don’t underestimate the hair straightener
Gearing up for a wild girls’ night out, a chic brunch, or just want to elevate your everyday look? Now you have all the tricks to transform straight hair into a head-turning style.
No cap, mastering the art of curling with a flat iron is a skill AND the ultimate party trick. One handy tool can create stunning hairstyles for the whole squad! Just imagine arriving at your girls’ trip and realizing you all forgot to pack your curling irons. No sweat—whip out that flat iron, and before you know it, you’re all rocking bouncy waves that compete with Marilyn Monroe, all without taking up half your luggage with hair tools. This means more space for all those accessories you’ll be sharing (extra purse anyone?).
The next time you find yourself in a hair jam, remember this simple solution. You’ll not only look mighty FINE, but you’ll also be the go-to hair magician of the group.

