Did you know? Dirty tools damage your hair (without you knowing it)
Be honest—when was the last time you actually cleaned your flat iron? If your answer is somewhere between I can’t remember and never, you’re not alone. We spend so much time focusing on hair health, investing in the best shampoos, conditioners, and heat protectants, but we completely forget that the very tools we use every day could be working against us.
Think about it, that flat iron, curling wand, or hairbrush you use religiously? It’s covered in layers of old product, oils, heat-damaged hair particles (gross, but true), and dust. Every time you use it, you’re transferring all of that buildup straight back onto your freshly washed hair. And if you’ve been wondering why your styling tools don’t seem to work as well as they used to? That product gunk is probably blocking the heat plates or clogging the air vents, making them way less effective.
The good news? Cleaning your hair tools is way easier than you think—and we’re about to break it all down for you. From flat irons to blow dryers to brushes, we’re covering the right way to deep clean your styling tools, how often you should be doing it, and why it’ll literally make your hair healthier (and your tools last longer).
Ready to give your hair tools the refresh they deserve? In the wise words of Lizzo—it’s about damn time.
Your hair tools could be damaging your hair
Let’s discuss the silent saboteurs in your hair routine—your own styling tools. You could be using the most luxurious hair masks, heat protectants, and leave-in treatments, but if your straightener or curling iron is caked in old product, you’re basically undoing all that hard work.
What's actually lurking on your hair tools?
If your flat iron smells burnt every time you turn it on, or your brush has more hair in it than your head does, it’s time. Here’s what’s building up on your tools:
– Product residue – Hairspray, heat protectants, dry shampoo, and serums all leave behind layers of gunk that bake onto hot tools, making them less effective.
– Oil & dirt – Natural scalp oils and sweat transfer onto brushes and irons, creating an invisible grime layer that sticks to your hair every time you style.
– Dead skin & bacteria – Sounds dramatic, but it’s true. Your scalp sheds skin cells, which collect on brushes and can harbor bacteria (aka, the stuff that causes greasy roots and potential scalp irritation).
– Heat damage buildup – Every time you use a hot tool, tiny burnt hair particles cling to the plates or barrel. Over time, this buildup prevents even heat distribution, leading to patchy curls, fried ends, and weak styling results.
What happens when you don’t clean your tools?
Dirty tools don’t just make styling harder—they can wreak havoc on your hair. Here’s why.
🔥 Less effective heat styling – Product buildup blocks heat plates, meaning you have to turn up the temperature just to get the same results, exposing your hair to more damage than necessary.
💨 Overheating & burning your hair – That old product residue? It can burn onto your hair every time you style, leading to more breakage and dry, brittle ends.
🦠 Scalp irritation & greasy buildup – Bacteria and oils from dirty brushes spread back onto your roots, making your scalp feel greasy faster (so much for that fresh wash day).
⚡ Shorter lifespan for your tools – Dust and lint clogging your blow dryer = weaker airflow. Residue blocking the heat of your plates = inconsistent styling. Translation? Your expensive styling tools won’t last as long.
Moral of the story? If you’ve been wondering why your curls won’t hold, your straightener isn’t smoothing like it used to, or your scalp feels greasy way too soon after washing—it might not be your products. It’s your tools.
But don’t worry, girlie—we’re here to save the day. Next up, we’ve got the step-by-step guide on how to clean every single styling tool the right way.
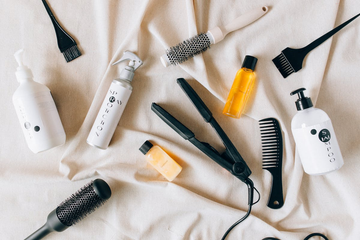
Your ultimate hair tool cleaning kit
Before we jump headfirst into the nitty-gritty (or should we say, the gunky and grimy?), here’s everything you’ll need to clean your styling tools like a professional.
1. Rubbing alcohol – The MVP for breaking down product buildup on flat irons and curling wands.
2. An old toothbrush – Because nothing scrubs grime out of tiny crevices like a retired toothbrush.
3. A microfiber cloth – For that final, satisfying wipe-down.
4. A bowl of warm, soapy water – Perfect for deep-cleaning hairbrushes and combs.
5. Cotton swabs – Gets into the nooks and crannies of hot tools (goodbye, mysterious gunk).
6. A small brush (or mascara wand) – Ideal for clearing out the lint and dust clogging your hairdryer filter.
7. Tweezers – Trust us, they’re great for pulling out trapped hair from brushes.
8. Your favorite playlist – Because cleaning is way more fun when you’ve got a good beat going.
Now that you’re stocked up, let’s get these tools looking (and working) like new.
How to clean every hair tool correctly
Alright, now that we’ve exposed the absolute filth living on your styling tools (sorry, but it had to be done), let’s get them fresh, clean, and working like new again. Because if we’re going to spend time perfecting our blowouts and heatless waves, we at least deserve tools that aren’t sabotaging our hair.
How to clean your flat iron & curling wand
If your straightener or curling wand is covered in burnt product residue, it’s not just an aesthetic problem. That gunk creates uneven heat distribution, meaning your iron won’t work as well—so you end up using more passes, more heat, and you guessed it—more damage.
What you’ll need:
– Rubbing alcohol or hydrogen peroxide
– A soft cloth or cotton pads
– A toothbrush (yes, an actual toothbrush)
The right way to clean it:
1. Unplug and cool down – This should go without saying but do not try to clean a hot tool. Let it fully cool.
2. Dampen your cloth with rubbing alcohol – Wipe down the plates (or barrel) to break down product buildup.
3. Use a toothbrush to scrub the edges – Old product loves to collect near the edges of the plates—this step makes sure it’s all gone.
4. Wipe it dry and let it air out – No need to rinse—just let the alcohol evaporate before using it again.
How often? If you use your flat iron daily, once a week is ideal. If it’s an occasional thing, aim for twice a month.
How to clean your hairdryer
If your blow dryer isn’t as powerful as it used to be, it’s probably full of dust, lint, and hair trapped in the vent. This blocks airflow, makes your dryer overheat, and can even shorten its lifespan.
What you’ll need:
– A small brush (like an old toothbrush or mascara wand)
– A dry microfiber cloth
The right way to clean it:
1. Unplug it first. Always. We’re cleaning, not trying to get electrocuted.
2. Remove the back filter. Most dryers have a vent cover at the back that twists or pops off.
3. Brush out the lint and dust. Use your small brush to loosen and remove everything trapped inside.
4. Wipe down the body of the dryer. Use a microfiber cloth to remove any product residue.
5. Put the filter back on. Easy. Done.
How often? Every 2-4 weeks, depending on how often you use it.
How to deep clean hairbrushes & combs
Your brush is a magnet for product residue, scalp oils, and dead skin, and if you’re not cleaning it, you’re just transferring all that right back onto your fresh hair.
What you’ll need:
– A comb or tweezers
– Shampoo or dish soap
– A bowl of warm water
The right way to clean it:
1. Remove all the trapped hair. Use a comb or tweezers to pull it all out. (Yes, it’s gross. Do it anyway.)
2. Fill a bowl with warm water & shampoo. A good soak helps break down oil and product buildup.
3. Swish your brush in the water. Let it soak for a few minutes, then use your fingers or a toothbrush to scrub between the bristles.
4. Rinse and dry. Shake off excess water and let it dry bristle-side down to prevent water from sitting in the base.
How often? At least once a month for regular brushes, but if you use a lot of product, every 2 weeks is *chef’s kiss*.
TYME-approved tips for keeping your tools cleaner, longer
✔️ Wipe down hot tools after every use. A quick swipe with a cloth prevents product buildup from ever getting out of control.
✔️ Store tools in a dry place. Your bathroom’s humidity speeds up bacteria growth (ew). Keep them in a drawer or cabinet instead.
✔️ Never wrap cords around your tools. This damages the internal wiring and makes them wear out faster. Loosely coil instead.
And that’s it—easy, right?
Now that you *know* how to clean your styling tools, you have no excuse not to do it. Your hair will thank you. Your tools will last longer. And honestly? That flat iron will finally stop smelling like something’s burning.
But, real talk—when are you actually going to clean your tools?
We’ve walked through just how much gunk is hiding in your hair tools (seriously, it’s enough to make your scalp cringe), so there’s one important question…
Are you actually going to clean them, or is this another task that will live rent-free in the back of your mind until your flat iron starts smoking?
The truth is, cleaning your tools takes less time than scrolling TikTok before bed. And if you want your hair to stay healthy, shiny, and free from unnecessary damage, it’s worth those few extra minutes. And quite frankly, If you wouldn’t use dirty makeup brushes on your skin, why are you using grimy, product-caked tools on your hair?
Think of it this way, your expensive styling tools weren’t cheap, so why let them break down faster than they should? Keeping them clean means they’ll work better, last longer, and give you the sleek, frizz-free results you actually want.
Okay, now go do it—like, right now.